Wednesday, July 3, 2013

Day 22 Barbeque Night

A foggy day
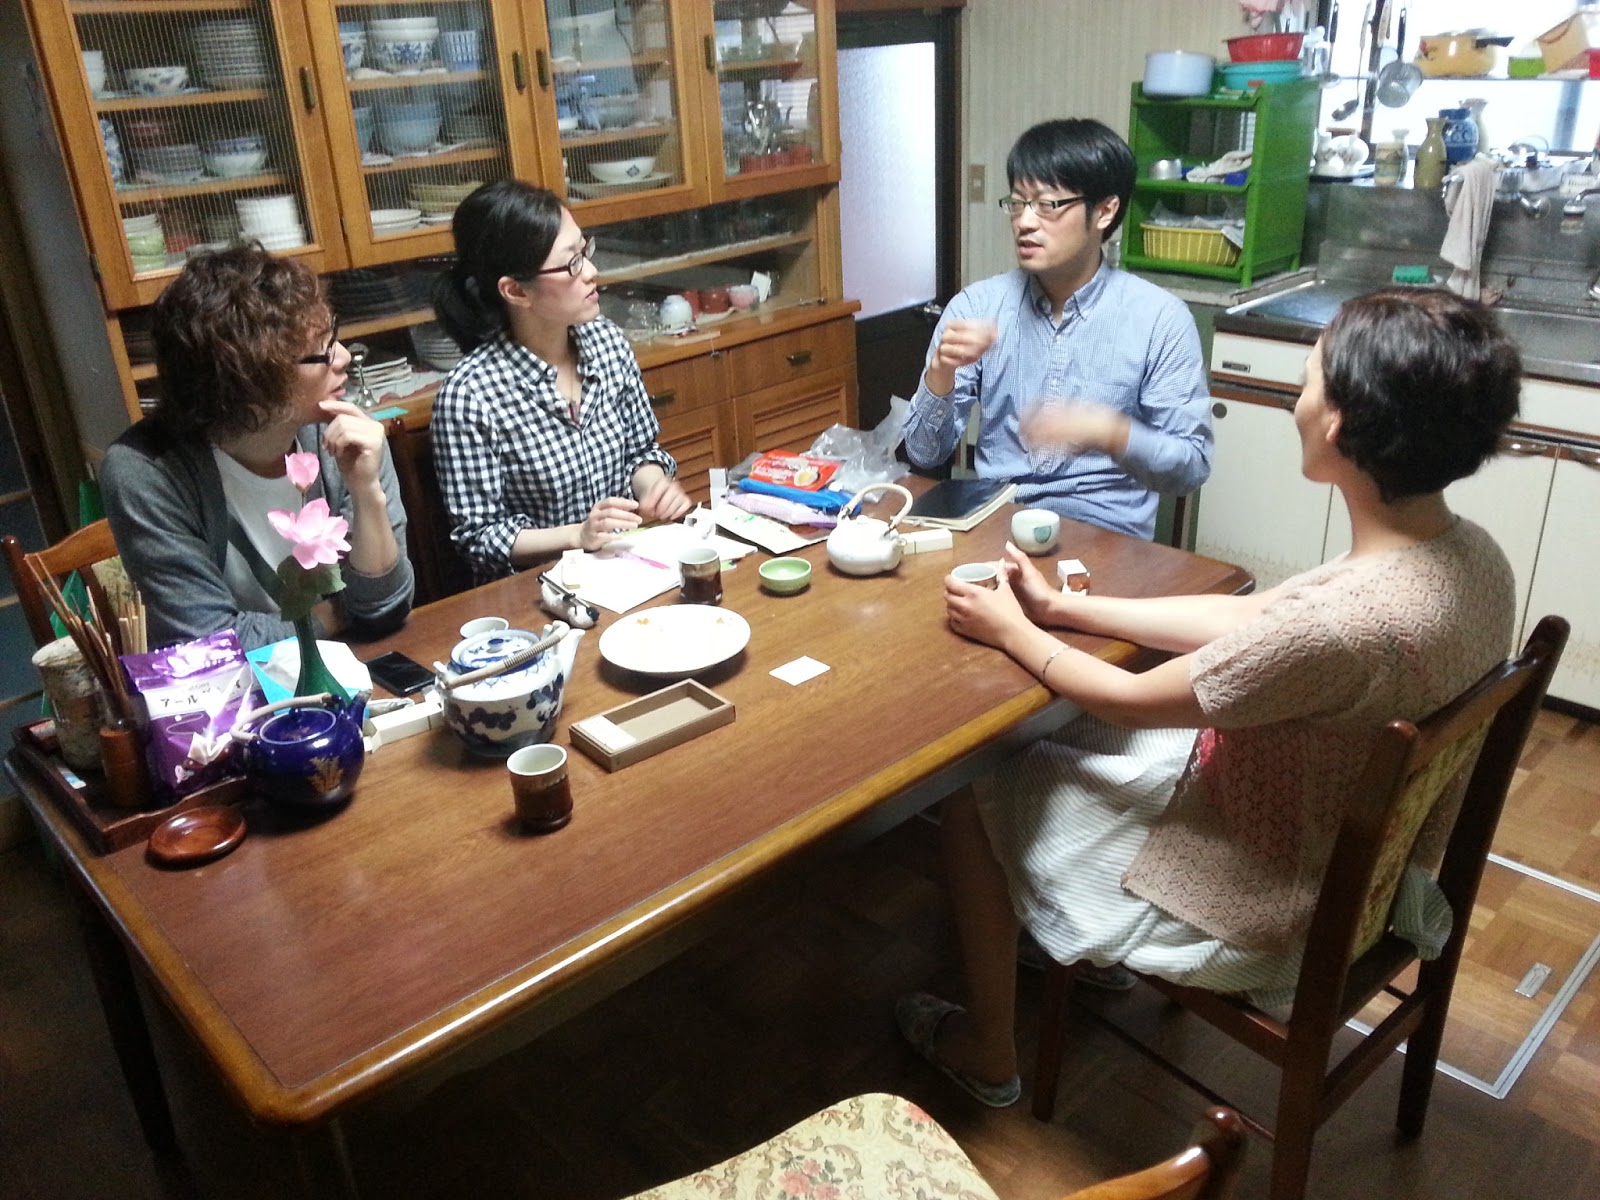
The weather feels a bit humid today, since it was raining from morning. This afternoon, we had special guests came over to our house, the friendly guests are Manno-san, Ayako-san and Kenji-san. They were very kind to offer us some food. We talked about how wonderful is staying here in Itoshima, unique culture, beaches, countryside landscapes and the lovely people as well. We also shared about our personal interests in arts and previous experiences before coming to Japan.

You can read more about the interview in here :
http://www.ito-artsfarm.com/2013/06/14/bernhard-bissan

Manno, Ayako, Kenji and Bissan discussing

After the interview, Hiro-san invited all of us to come to Studio Kura for a barbeque party. Yeayy it's about time just need a mood booster! Though it is raining outside, we still had a great time barbequing and eating together with all friends at Kura. The food is just keep coming endlessly!


Finally the feast was done, had an awesome time today, i'm so full! At last, after recharged my energy now it's time to continue again my Samurai Karasu,, Ganbate


Day 21 Placing Armature to Platform

Now it's time to put the whole thing together on the platform, starting with the legs as the base, the legs is the main key thus it must have a strong foundation. i add another clay at the tip of the foot to make the lower part of the foot flat, then cut it to have a hard crisp shape.


After i got the clean shape of the foot, i placed the clay at the middle of the wood platform then add markings on the corners. Not only the corners, the markings for the armatures are also important later not only to know where to place the clay, but also for the holes so the wires can go all the way inside the wood platform. I used a tracing paper to put of the markings and holes, then i projected the markings from the paper into the wood platform.


Put markings on the tracing paper
Now since we have the markings, i took out the armatures from the leg and baked it again on the microwave, since the lower part of the foot must be very flat and solid to stick on the ground.
By this stage, we need to glue the armature with the clay and platform, so we need to confirm that the clay wont' need any more baking, because it might be dangerous to put any wires inside the microwave.


Project the markings on to the platform
 After that i drill the holes on the platform then plant the armatures with the legs part, then put super glue on them so it will bond stronger. As the legs stood still, i tried to place to upper torso and the head to see if the leg is strong enough to support the upper body. Seems its doing a pretty good job holding up the weight and giving a firm construction on my sculpture.


So once all the big main parts are done, i can assemble the rest of minor parts to cover the joint parts and paint them on the finishing stage.

Day 19 & 20 Armor Detaling

After done the leg parts yesterday, today i'm suppose to finish up the head and arms. Since this sculpture is inspired by crow or Karasu, i might just call this project as "Samurai Karasu." Here is the main plot that i made for the "Samurai Karasu";

" The identity of the man behind the Samurai Karasu armor, was secretly hidden. Known as one of the last survived descendant of Samurai warrior, he learned Bushido or Samurai way of life that has been secretly passed down from his ancestors. He was a pilot military engineer that got crash landing accident, but after revived he was being outcast from the society due to his "grotesque" face and "creepy" voice. With his martial art skills and highly powerful machine armor of his creation, he devoted himself to help against any dangerous threat to his country. "

My cooking experiment
Arms with detachable armatures
.

For the concept design of the armor, i combined pieces of elements that resembles the past (Yoroi samurai armor) and the future (high tech armor suit). For example on top of the Kabuto or helmet, i made a symbolized shape of Mount Fuji. In Kamakura period, Samurai warriors used the base of the Mount Fuji as a remote training area. His Helmet "horns" or Wakidate has a super radar telemetry transmitter that can gather realtime information about his surroundings. The neck guard at the back or Shikoro, consists of solid solar panels that absorbs natural energy from the sun then utilize it to become his secret ultra-power.

The Mount Fuji shape on the Kabuto
Back armor with wings extension at each sides
Back armor, neck guard, and Chest plate armor placed on torso

Working late at night
The major parts of the armor

Monday, July 1, 2013

Day 17 & 18 Hard days night

Ohaiyou Gozaimasuu..woke up a bit late today, feel so lazy to get up early after last night worked very late. Today i went out with Bissan, my new housemate to get some lunch together. After had Udon for lunch, we stopped by at the market get some groceries for food stocks. The weather outside now seems changing to rainy season, its rarely rained in here and the sun was quite hot.  


At Makino Udon Kukoten with Bissan
Back to studio, i start to continue again my Samurai sculpture. Hiro asked me how many artworks will i showcased later for the presentation, at the moment i only have this Samurai sculpture as my main project. If i managed to finish this sculpture earlier before the deadline, then i will do another artwork maybe one or two more for my presentation.


Second layer for the head part


I try to push the time for the sculpture, since i want to make another artwork for the presentation. I was thinking of doing something that people here haven't really seen before.. maybe i will create something from Indonesian traditional art.  

Poster for my presentation talk


Day 15 & 16 Foundation for the mesh and armor


After done with the base mesh yesterday, today i'm going to make base layer for the armor. It's quite difficult to get the actual shape that we want sometimes especially for hard surfaces. The best way to do it you must have a proper tools. Though i have some tools that i brought with me, i went to a DIY store near the studio to look for any other sculpting tools that might be useful.

Add some armor for the leg part


The base mesh has already baked with holes inside them for the wires or in sculpting we usually called it armatures. The armatures goes straight from bottom part of the legs until the upper part of torso. This armature later will play an important part, so it must have a strong base that can support the weight and combine all the separate parts of the sculpture. Since the base mesh later will be covered by layers of armor, i will have to make the parts to fit in with the base and make it detail enough for the audience to see so people will less focus for the joints.

Making the small parts for the armor (left) and the armature (right)

Patterns that i made with regular items

As i sculpt and wait for the clay to baked, i'm experimenting with other tools that i can find around the studio and try it maybe i can get an interesting pattern designs that can save me a lot of time and nice result.

It takes a lot of patience to do this kind of work, because of the scale of the sculpture (which is about 30 cm height) i wanted to have more space to make fine details for the armor. And sometimes the shape is not 100 percent what i wanted (due to baking result) or just doesn't seems to fit with the rest of the parts, so we need to figure out what modification needed, is it the thickness, the shape or maybe the angle, then re-model it and bake it all over again.

Pieces for the outer armor

Day 14 Project planning & problem solving

This morning i met with the new artist i residency, Bissan Rafe, she's a Palestinian born painter came from Texas, USA. She has her own studio in USA, and already had exhibitions in some foreign countries. She is here to complete her series children fairytale book from her exhibitions in different countries. Wow, it's so interesting to meet new artist with different background and experiences. We talked a lot and share our own stories, she's a also fun person to hang out with as well. It's great to have another fellow artist, welcome aboard!

After breakfast, i went to studio to start mapping out the plan for my project which left about 2 weeks more to go. I've got some alternative sketches for the Samurai armor, which i made when i was visiting the Museum in Tokyo and on my way trip to Fukuoka.
I choose to make samurai sculpture though i am a 3D modeller artist, i wanted to do something different rather than a 3D CGI. To make something presentable where people can actually see and feel in real life, is just something that i have never accomplished and wish to fulfill as an artist.

Japan combined live action robots with VFX, way before Ironman the movie

When i was a little kid, i always enjoyed watching most of Japan's anime television series and Tokusatsu shows. Tokusatsu is a Japanese term that applies to any live-action film or television shows that use special effects. Even though they all have a same idea, which is about robots or heroes that fights the space invaders, it's amazing how Japan can produced hundreds (or maybe thousands) of completely unique designs by its own. In the 80's, Metal Hero series like Gavan, Sharivan (Space Sheriff Series), Dai Sentai or Goggle-V, Kamen Rider, Kikaider, Ultraman, Mazinger-Z, are just some of my favorite shows that i can mention.


The Samurai mobile suit or armor that i'm going to make combines high technology features and ancient Yoroi / shogun armor design. The Samurai armor inspiration was actually referring from crow or also known here as Karasu. The idea came to me while staying here in Itoshima, i spotted many crows nearby. Crows have long stood as a symbol of power in Japanese mythology, but nowdays they tend to be seen more as a menace as they tend to steal, disturb and also trick people.

Based from references that i had, i constantly re-draw and modifying my sketches until i feel happy with the result. After i got the desired design, i made the blueprint for the sculpture with actual scale in front view and side view.


Some of my early designs for my sculpture


However, there is one problem that i am facing during my sculpture production. Since we don't have an oven here at the studio, i need to figure out a way to bake the clay. The clay that i'm using is an opaque color original Super Sculpey, it's an oven based clay type so if you heated up the clay it will become hard.

Looking for possible alternative way, i found an article about an experiment of baking the clay with water and microwave! I give it a try and finally it turned out pretty good, the clay has turned into solid!


Before i put inside microwave
Set around 6-8 minutes
Came out hard as rock!
All you need is just a microwave safe container, try to get the maximum size that can fit your microwave. Then place the clay inside the container then fill it with water, just enough until it covers the whole clay ( it needs to be fully drown because you want the heat to be distribute equally). Then you close it and put inside microwave, set it around 6 or 8 minutes (depending on the size of your clay), if you still think it's not hard enough you can always heat it back until you satisfied. 

Once i figured out how to bake it then, the next thing i need is to fit the size of clay into the container. To do that, i measured the height of the container, then i break the height of my sculpture based on it. In the end, i got 6 main separate parts which later i will construct them as the base mesh they are head, torso, 2 arms, and 2 legs.


Placing armatures on the base clay before i baked it

Hiro's kawaii cute baby, Noi-chan
Hiro before doing fire fighting duty